Sowing seeds from green capsules
The content of an intact orchid capsule is sterile. If you sterilize the surface of the capsule and open it under sterile conditions, then the seeds are sterile. This method has the advantage that the seeds themselve do not need to be sterilized (which can sometimes damages them).
necessary tools
- laminar flow hood
- alcohol burner
- 2 forceps
- scalpel (or a very sharp knife)
- glass petri dish
necessary articles of consumption
- flasks containing media
- kitchen paper
- 70% ethanol
- Clorox (bleach solution)
- jar (for sterilizing the capsule)
- cotton pad
- dishwashing detergent
Advantages of green capsules
Disadvantages of green capsules
|
Preparing the flasking area
This document describes the procedure of flasking orchid seeds in a LFH (laminar flow hood). Detailed informations how a laminar flow hood works and how to build it are available here. The following photo shows our LFH and all required tools. In the laminar flow hood there should be as less things as possible to reduce the risk of contaminations to a minimum.
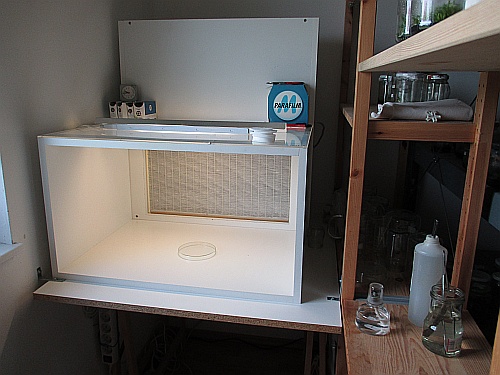
The flasking area has to be sterilized before you can start working in it, because contaminations get in contact with the flasking area when the LFH is turned off. We soak a kitchen paper with 70% ethanol and use it to clean the flasking area after turning on the LFH.
Sterilization of green capsules
Carefully remove dead flower parts of the capsule to reduce the risk of contaminations.

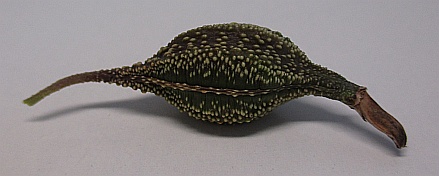
Rinse your jar with 70% ethanol and fill the flask with a 1% chlorine solution. Because DanKlorix has a concentration of 2,8%, it has to be diluted with distilled water (1:2). To make sure that the solution reaches every region of the capsule, a drop of dishwashing detergent should be added to the chlorine solution. Now it's time to clean the capsule with 70% ethanol (a cotton pad work fine here) and put it in the chlorine solution.
Seed sowing
The following steps must be done in the sterile area (steam). Open test tubes and their cotton plugs have to stay in the steam till the test tube is closed again.
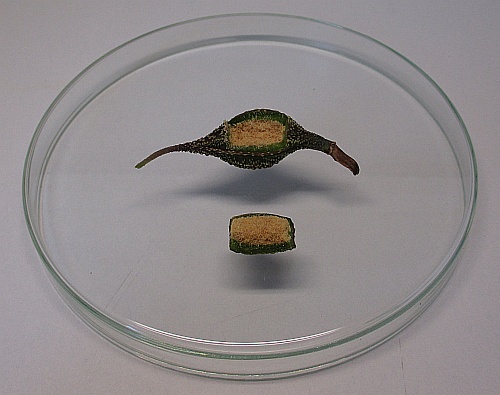
After sterilizing the capsule for 15 minutes, bring the jar with the capsule in it into the flasking area. Next, clean your glass petri dish with a cotton pad, which was soaked with 70% ethanol. Take a forceps out of the bottle with 70% ethanol and flame the forceps. Use the flamed forceps to transfer the capsule from the chlorine solution onto the glas petri dish. Take the scalpel, flame it and open the capsule with it. Now, clean your forceps and the scalpel with a 70% ethanol soaked cotton pad and bring your tools back into the bottle with 70% ethanol.
In the next step take a flasks containing media and open it in the flasking area.
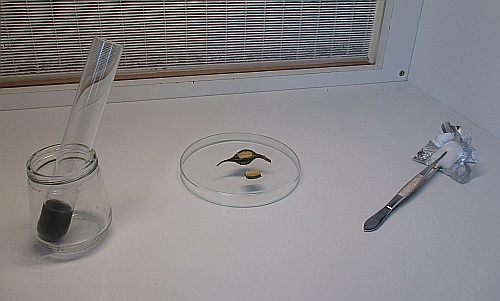
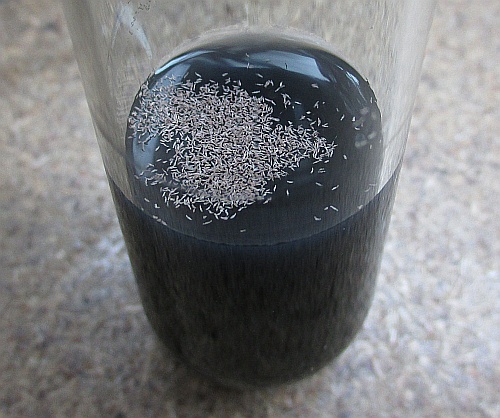
With a flamed forceps pick up some seeds and place them on the media. Next, clean your forceps with a 70% ethanol soaked cotton pad and put the forceps back into the bottle with 70% ethanol. Close the flask and move it to a place outside the flasking area for later labeling. Proceed with the remaining flasks in the same manner.
Further care
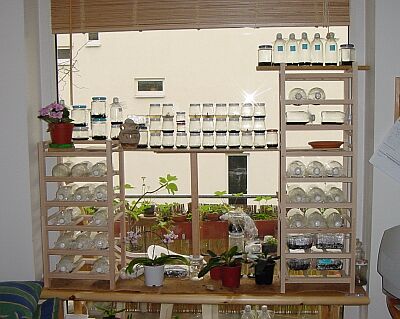
You should keep your flasks in a bright and warm (20 - 25°) place. It is very important to prevent direct sun, because the seeds in the flasks will become to hot if they get direct sun. Beside nature light, artificial light can be used as well. We prefer T5 fluorescent tubes with light color 865. T5 tubes need less power and they do not get that warm as T8 tubes do.

Author: Thomas Ederer